VisualSP allows for 3 levels of permissions. This hierarchy is based on the range of permissions and roles allocated to each type.
To manage permissions, go to the Manage My Subscription page and make changes under the Permissions tab.
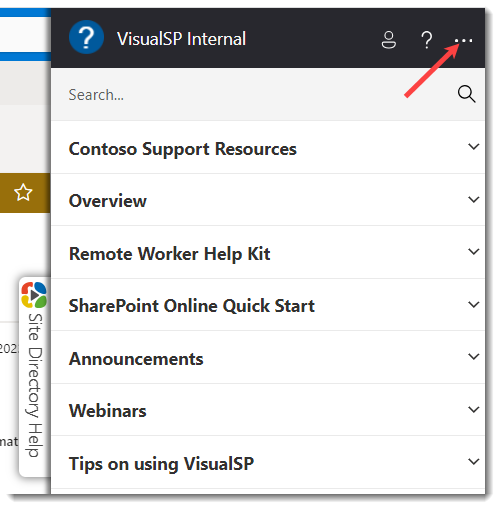
- From any page where VisualSP is activated, click on the VisualSP tab.
- Click on the 3 ellipsis in the top right corner.

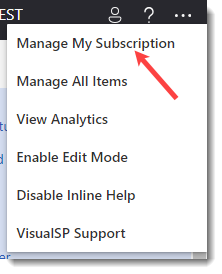
- From the drop down menu, select Manage My Subscription.

- Click on the Permissions tab.

- In the Filter permissions groups by application drop down menu, select the App Scope for which you want to see the permission group, e.g. SharePoint Online, Outlook Calendar, Excel Online, or OneDrive, etc. Or, to show all permission groups, select Show permission groups for all app scopes. After you’ve made a selection, the relevant permission groups that have been created will be listed in the field underneath. Each permission group shows the name of the group, e.g. SharePoint Admins, and the role attributed to that group, e.g. Role: App Administrator. You can edit an existing Permission Group or create a completely new one.

- To edit a Permission Group, click on it to select it. Its name, role, and list of members will be listed in the fields to the right.
- To remove a member from the group, in the Members field, click on the circle x icon next to the member's name and email address.
- Click Save. The user will be deleted from the group.
- To add a member to the group, in the Add Members field, enter the email address of the user and click on the circle + icon. The new member's name and email address will appear in the Group Members field. The new member's email address domain has to match the subscription domain name, otherwise, you will get an error saying that "This email address does not match the email pattern for your subscription …” You will also notice that the first name and last name of an added user who has never logged in the system before will be listed as "Unknown, Unknown". Once the user logs in the system for the first time, their first name and last name will be shown.

- Click on Save Group. The new subscription administrator will be saved and will stay on the list in the Group Members field.
- To add a new Permission Group, such as a new type of administrators or editors, click on the Add Group button.

- In the Name field, enter the name of the new group.
- From the Role dropdown menu, select the role for the group.
- From the list in the App Scopes field, select the applications on which the group will have administrative or editorial role.
- In the Add User field, enter the email address of a user that you want to add to the group. The user name, surname (marked as unknown until the user logs in the system) and email address will be added in the list of members in the Members field.
- Click on Save. Your new Permission Group will appear in the field to the left. Later, you can select it and add or remove members as needed.
To optimize control on the VisualSP functionalities on different applications for different users, put administrators and editors in the right Permission Groups. Managing permissions is all about creating groups and allocating roles to them.

