Walkthrough element selector

Applies to: VisualSP
One of the challenges with Modern pages is elements on the page can have dynamic IDs. This means an element can have a different ID every time the page is refreshed, and if you have a walkthrough step tagged to that element, your walkthrough will skip that step. We have expanded what elements can be selected and how they are selected, thereby improving the reliability of the element selected. These instructions will introduce you to the new interface and the improved element selector functionality.

New interface

In the walkthrough editor, the element selector has a new look:
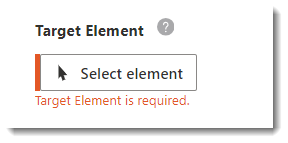
Clicking Select element will minimize the editor window and display a new element selector control in the lower right corner of your browser window:

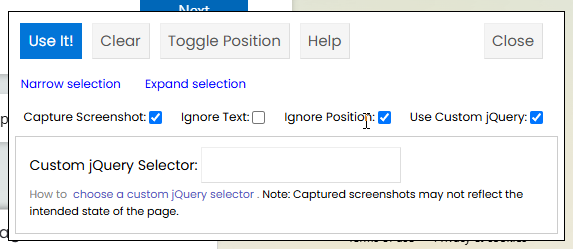
The Use It!, Clear, Toggle Position, and Help buttons have not changed and have the same functionality.

Moving the cursor around the page to highlight and select the different page elements is still the same experience. Once you select an element you can then fine-tune your selection in various ways:

    1. Narrow selection: Clicking Narrow selection will step you down through the child elements of the selected element. When there are no more child elements, you will see a message that you "Cannot narrow further."
    2. Expand selectionExpand selection will do the opposite of Narrow selection; clicking Expand selection will step you up through the parent elements of the initial selected element. When you are at the top parent level you will see a message that you "Cannot expand further."
    Note

    You may find that with Modern pages, the element ID will change with every page refresh. You can use the Narrow selection and Expand selection to find an element that doesn't have a dynamic ID.

    1. The Capture Screenshot select allows VisualSP to take a screenshot of the current window to assist in preparing training documentation
    2. Ignore Text: By default Ignore Text is selected. If this box is unchecked, you can use text, such as a document name or page title, to help identify the selected element.
    3. Ignore Position: By default Ignore Position is selected. If this box is unchecked, you can use the position of an element on the page to help identify the selected element.
    4. Use Custom jQuery: By default this is unchecked. If you check this box there is an extra dialogue displayed:

The Custom jQuery is most similar to the original Element Selector. You can move your cursor about the page to select the element, or for more advanced control, manually input a custom jQuery selector.

Updated on November 24, 2024

Related Articles