

With VisualSP, you can create an inline help item within the context of a page.
Here are the steps to creating your own inline help item.
As a subscription administrator, you will need to confirm your subscription has inline help activated.
- Go to Manage My Subscriptions from the hamburger menu in the help panel
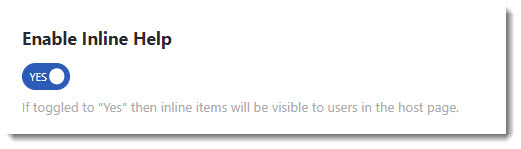
- In the left navigation column, select Look and Feel. Toggle Enable Inline Help to Yes:
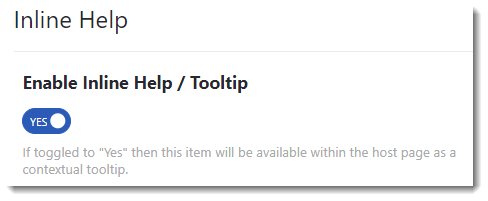
To create an inline help item, create a help item as you normally would, but toggle the Enable Inline Help / Tooltip to yes:
When inline help is toggled to yes, additional options will appear in the help editor. First you will need to select an element to attach the inline help icon to:

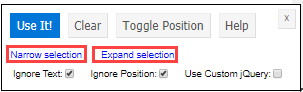
This element selector acts in the same manner as the element selector in the walkthrough editor.
For some media types, you will also see two additional items you can configure: Display as Tooltip and Position:

Customize Icon/Button
If you would like to customize the icon, you can do so my clicking the Customize Icon/Button toggle:

When the Customize Icon/Button option is selected, you are then given the option to Show As Button:

Displaying the icon as a button will draw more attention to it and is appropriate for more urgent notifications.

You can also customize the background color and the icon/button text color, Show Pulse, and/or Remove Icon After View:

Clicking the Show Pulse toggle will display a couple of additional configuration options: Pulse Duration and Custom Pulse Color:

Pulse Duration controls how long the icon will pulse for, while the Custom Pulse Color is the color of the pulse.
Clicking the Remove Icon After View toggle will make the icon disappear after it has been clicked.

Additional configuration options are available by clicking the Toggle inline Help Icons Advanced Properties link, and the options available will depend upon the Media Type selected for the help item.
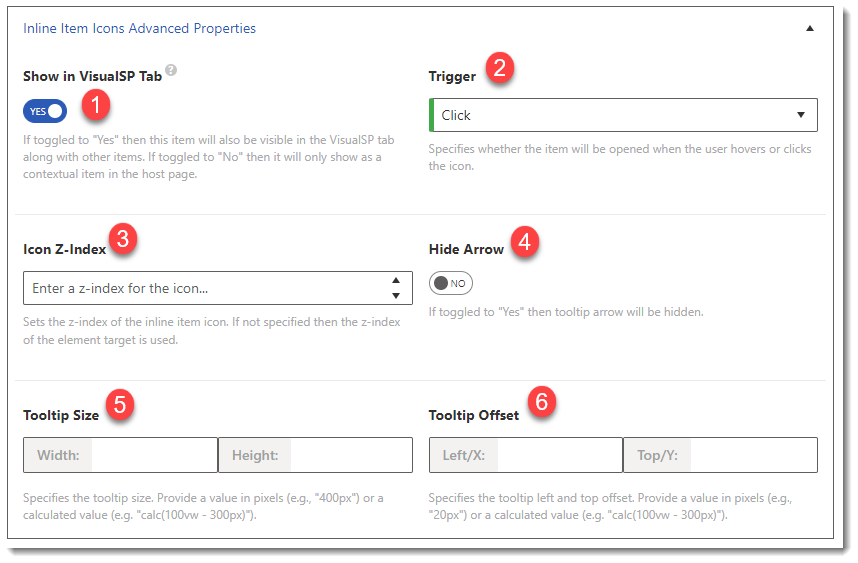
- Show in Main Help Panel. Toggling this option to yes will display this help item in the Help panel. By default, inline help is hidden.
- The Trigger drop down options include Click, Hover (automatically close on mouse out), and Hover (users must click close button to close)
- Icon Z-Index. Helpful to bring the help icon forward if it is hidden behind an element. Can also be fixed by adjusting the element selected by narrowing or expanding selection:
- Toggle Hide Arrow to No to hide the tooltip arrow.
- Tooltip Size allows you to adjust the bubble size to better hold the content of the help item
- Tooltip Offset allows you to adjust the tooltip left and right offset
Inline Help Best Practices/Tips
- If the help item won't be displayed in help panel, assign Inline Help as the category name. This will organize inline help into a single category and makes them easier to find. Best practice is to NOT display an inline help item in the help panel because:
- Inline help gives user a more intuitive understanding of what the help item will be about, vs the help panel, which must be deduced by reading and understanding the text description
- Declutters the help panel
- By assigning Inline Help as the group name, makes it easier to find all your inline help items under one category
- For testing purposes, see if element selector moves/changes if another element is clicked (for example, a document is selected, which changes the ribbon options). If it does, solution is to uncheck "Ignore text" from the element selector configuration.
- If the inline help icon seems to disappear when previewing the help item, go back into edit mode and move the help icon further away from the selected element. It is possible the selected element has a higher Z index which is causing it to hide the help icon. You can also click "Expand selection" to change the selected element and see if the help icon appears.
- You can configure inline icons for all of the help item media types by going to My Subscription and scrolling down to the Look and Feel section and uploading an icon into the Inline Help Icon field.
- It is best practice to test your inline help item by shrinking your browser to see if the inline icon stays attached relative to your anchor element. If the inline icon doesn't track with your desired anchor, reselect the anchor element and attach it to a thing rather than a space.