

VisualSP Help System provides in-context, on-demand help to Dynamics 365 as well as many other browser-based applications. It provides walkthroughs, task based video tutorials, tip sheets and annotated screenshots to help users when they need it most.
In addition, it has the capability to accept in-house created content or content from the web and display them in-context as well. This tutorial will show you how to use VisualSP with Dynamics 365, but the steps are the same with any SharePoint, Microsoft 365, or other browser-based application.
Watch this preview to get an idea how you can use VisualSP with Dynamics 365:
Using VisualSP with Dynamics 365
After you have deployed VisualSP through a managed solution or our VisualSP browser extension, navigate to Dynamics, you will see the VisualSP help tab in the lower right corner of your screen:

Once you click on the tab, you will see the learning content that is available to you in that context in the form of short videos, articles, walkthroughs, tip sheets and more.
Customizing VisualSP for Dynamics 365
You can customize the default location via the Manage My Subscription page or users can drag and drop the tab to their preferred location. This location is stored as a browser cookie, so it appears in the same spot as the user navigates through any VisualSP supported web application.
It is important to teach your users that they should click on the help tab when they need help. Clicking the tab will open the help panel, which will have the help items available in that scope.

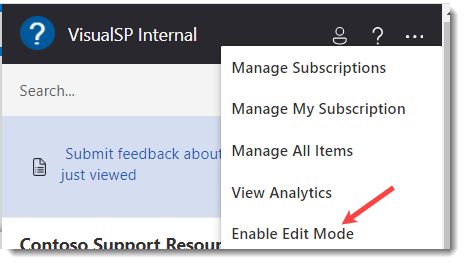
To access Administrative pages, click the 3 ellipsis in the top right corner of the panel and click Enable Edit Mode:
To add a custom help items, click the ADD ITEM button.

Next select the Blank Item template or any other available template:

The View / Media Type is where you select the type of help item you wish to create.

Here are some specific support articles on Creating a Basic Walkthrough, Creating Video Help Items, and an Inline Help tutorial.
After you have created one or more help items, they will appear in the help panel.

You can also access a Manage My Subscription page from the 3 ellipsis. Here you can manage your subscription, add users as Editors, view a gallery of Help items, and view your analytics.

VisualSP is a powerful, yet easy-to-learn application. We encourage you to jump right in and start creating help items that solve a business need or provide contextual help to your users. We offer many different support articles at visualsp.com/support to help you learn and get the most out of VisualSP. Got a question you can't find an answer to? Just send an email to [email protected] and one of our customer servicer engineers will be happy to assist.
Filtering in Dynamics
In addition to the ability to display a help item using a URL and browser type filter, we have expanded the filtering capability in Dynamics. For Dynamics only, you have the additional filtering capability using Scopes and Roles. The options look like this on the Editor window, under the Filters / Targets section:

The Dynamics 365 Scopes tab allows you to filter the help item so that it displays only in relevant parts of Dynamics.
- First select / type the Application Name from the drop down, then select / type the Entity Name.2
- Use to toggles to select whether the item should display in List, Form, or Dashboard pages for that entity.
- Click the green + Add Dynamics Scope button to add it as a filter.
- Repeat this process to add as many apps and entities as are appropriate for the item you are editing.
NOTE: The Application Name and Entity Name drop-downs attempt to display custom items for you from your environment. If you can't find what you're looking for, you can type in the name manually.
NOTE: If need to type custom entity names, but you do not know the exact name to use you or your Dynamics admin can identify them within your Dynamics environment:
- Sign into your Dynamics 365 application.
- Navigate to Settings in the top right corner of the screen.
- Select Customizations.
- Click on Customize the System to open the default solution.
- In the left-hand navigation pane, under Components, select Entities to see a list of all entities in your system, including custom ones.
The Dynamics 365 Roles tab allows you to do the same kind of filtering based on the user's assigned role(s) in Dynamics.
If you are trying to filter based on environment, add-in solution pages, or other elements that are not possible with the options above, consider using URL filters or Audiences. For more information, please see this support article.